In this guide we are going to share some simple Windows 10 tricks using which you can automatically enable WiFi in Windows 10 after a set interval of time on PC desktop, laptop or tablet. Sometimes you need to switch between network providers on your device for work or security purposes, or just want to disable intenret connection to your device, in such cases, turning WiFi ON/OFF on Windows 10, or any other OS for that matter, can get annoying. It makes a lot more sense to set Windows 10 to turn on WiFi on PC after a specified number of hours or set time interval. Here, you will be able to learn how to do it on your Windows 10 powered device. This method is not available on older Windows 7, Windows 8, Windows 8.1, Vista, XP, but you could give it a try on older Windows OS if you wish.
Substantial number of Windows users choose to keep WiFi on their devices turned OFF for several reasons. Some choose to keep WiFi OFF due to connectivity problem, other don’t want annoying app notifications and updated pushed on to the device during some work, watching movie or any other personal tasks or business presentation. In such cases, disabling a WiFi connection on your Windows 10 running devices is understandable. However, once you turn WiFi off, you can forget to turn it back on.
Whatever the case, you can opt to turn on WiFi for a pre-defined number of hours, after which it will enable automatically on Windows 10 device. If your PC is running on Windows 10 update build 14942 or later, you can use it use automatic WiFi ON feature on your device. Microsoft for some reason forgot to shed some light on this great new feature of Windows 10. However, it is easy to access and use. See the two separate methods with which you can set Windows 10 to turn on WiFi automatically after a set time interval on PC desktop, laptop or Surface Pro tablet.
How To Automatically Turn WiFi ON in Windows 10 After a Set Interval
See the steps in two methods below to enable automatic WiFi enabling feature on Windows 10 device.
Method 1
1 – To start off, click the wireless icon in the taskbar. Then, click the Wi-Fi button which should disable the internet connection in Windows 10.
2 – When you turn off WiFi, you will see a drop-down box titled ‘Turn Wi-Fi back on’.
3 – Click on the drop-down box, and choose the interval after which WiFi will be back on automatically.
Method 2
1 – To being with, you need to go to the Windows 10 Settings app. Either press ‘Windows + I’ keys or access the Settings app from the Start menu.
2 – In Settings, click on ‘Network & Internet’ option to open a Settings window with options needed for enabling automatic WiFi on feature.
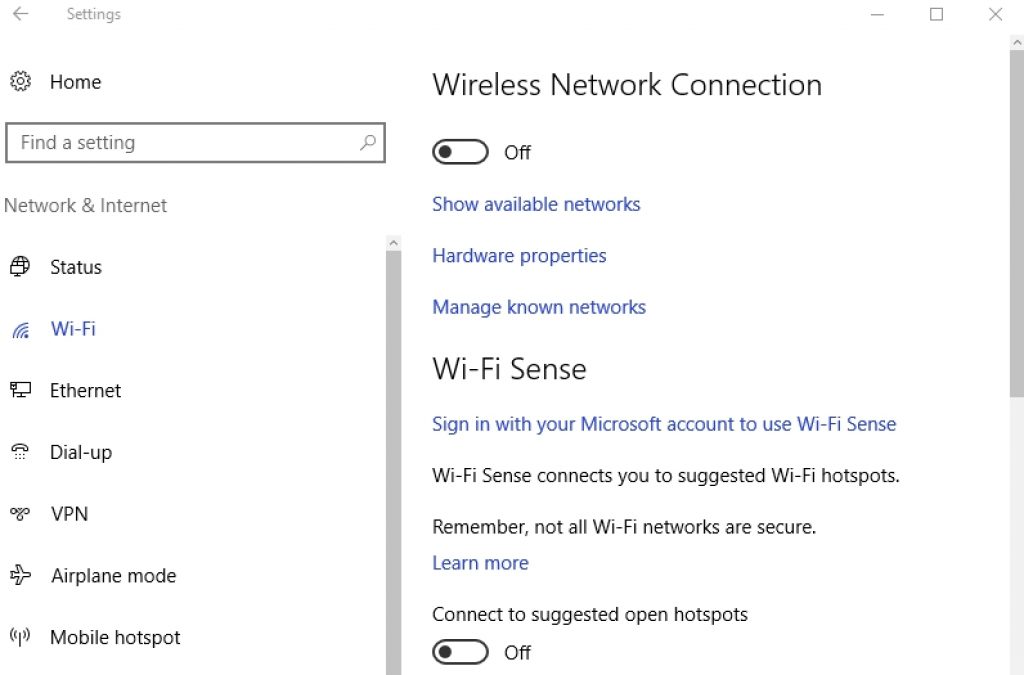
3 – On the left-pane in Network & Internet settings window, select WiFi from the list of settings.
4 – On the right-pane of the Wi-Fi settings window, turn the Wi-Fi toggle to OFF position.
5 – As soon as you disable Wi-Fi in Windows 10 (build 14942 or later), a new drop-down menu item named ‘Turn Wi-Fi Back on’ will appear with Manually, In 1 Hour, In 4 Hours, In 1 Day options on the list. Make sure selection, after which Windows 10 will automatically enable WiFi when the selection time period elapses.
6 – All done.
Now there is no need to automatically switch WiFi on or off in Windows 10 over and over. Because with this new feature, Windows will take care of that for you. How do like this new Windows 10 feature, share your thoughts in comments below.
See more on Appsforwin10:
How To Fix No WiFi Available in Windows 10
How to Fix Saved Wifi Networks issues in Windows 10
Baidu WiFi Hotspot for Windows 10


