If Cortana on Windows PC is not showing accurate or any search result at all that you are looking for, it might be it is not scanning PC location from where to pick up the required information or it hasn’t been set to look into certain PC locations to dredge up search results. Here see how to change or add a new Cortana search file locations on PC Windows. Cortana search assistant on Windows 10, 7, 8, 8.1 PC/laptop is fast and shows pretty accurate search results compared to similar other tools on the market. It is your personal digital search assistant that comes pre-installed on Windows 10, users of Windows 7/8/8.1 can also download it from Windows Store. Guide below will help you to add new Cortana Search File Locations on Windows 10 (32-bit/64-bit).
Cortana for Windows 10 helps you to carry out different tasks, including syncing notifications between devices, settings daily reminders, alarms, tracking packages and flight details and much more. Moreover, Cortana uses Windows Search, and web search using Bing search engine. Bing is default search engine on Cortana but you can change search engine on Cortana to Google or any other you like. Just enter the query in the search box on the taskbar to find anything you need on Windows 10 like documents, files, images, and Cortana will return the best result based on local or online searches.
However, searching files saved in external locations, such as external hard drives or in location other than the default Downloads, Music, Pictures, Documents, hard drives etc., using Cortana will not bring up the desired files in the results. Reason being Cortana uses Windows Search for local files on PC, and Windows Search is based on default configurations that specify which folders are indexed for searching files. These default settings excludes additional storage locations that have been added manually on PC including alternative folder paths.
How To Change Storage Location for Indexing on Windows 10
Follow steps below to change the default local search configurations, which Cortana can reach when looking for result for searched queries.
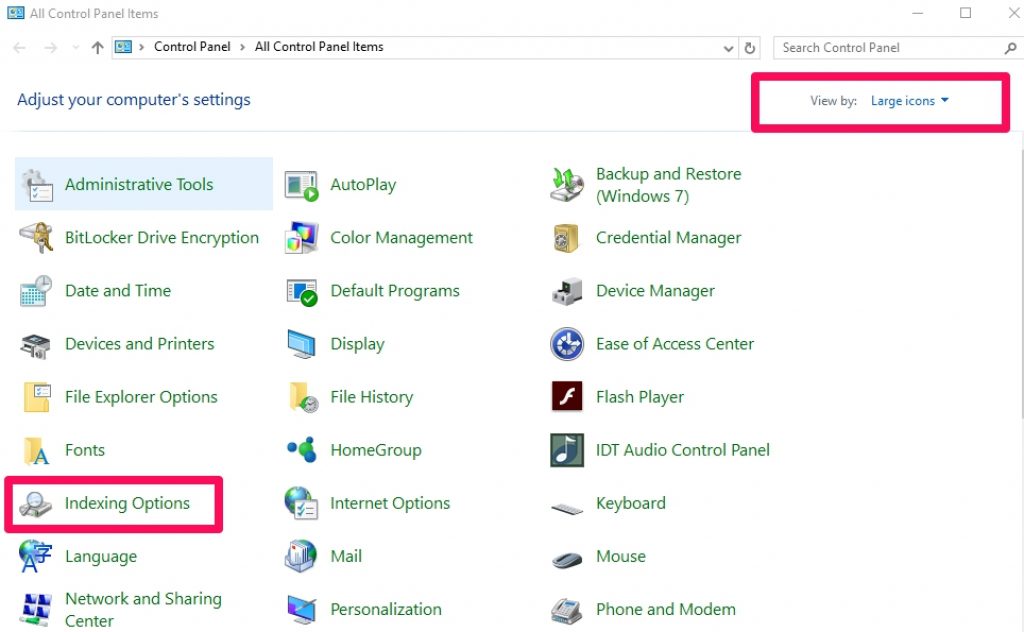
1 – Open Control Panel, for that, click Windows + X keys to open Power User menu and select Control Panel or click start and go to Control panel.
2 – Change Control Panel view to Large icons and click on Indexing Options.
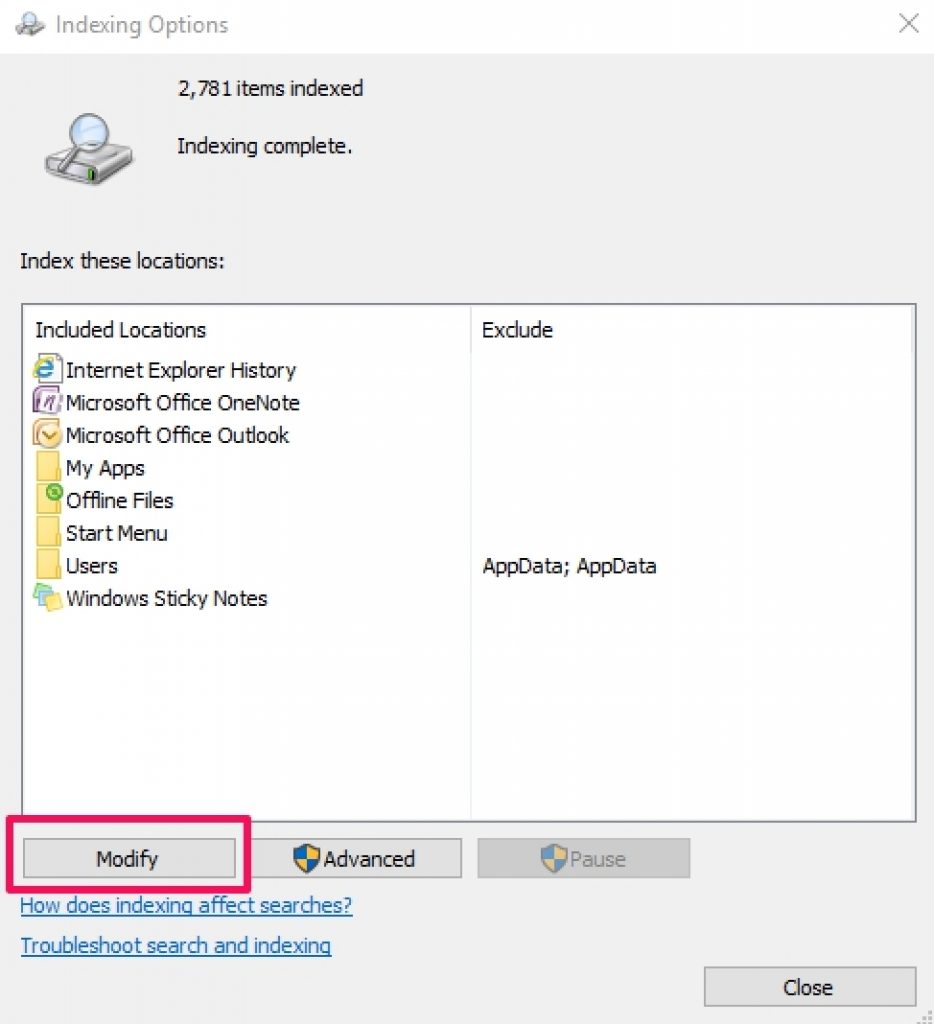
3 – On Indexing Options box, click Modify.
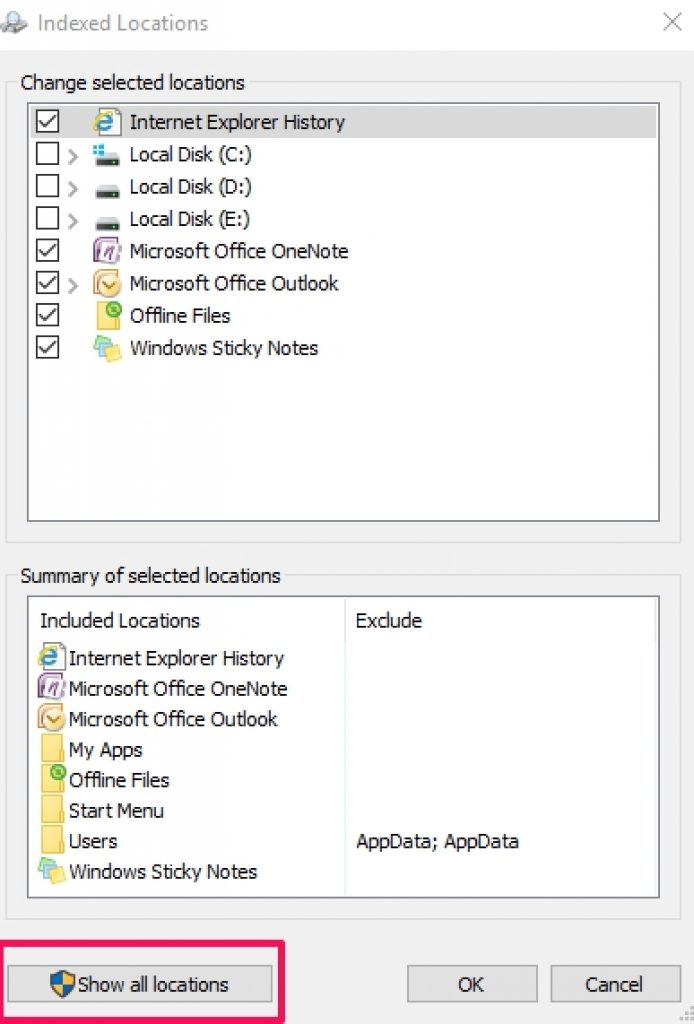
4 – Next, click Show all locations.
5 – Select folders and drives on Indexed Location you want to give Cortana permission to search.
Note: Here, you can also disable location or files which you don’t want Cortana to look for during the search and show on the result list. Similarly, if you want Cortana to search only the main folder and skip sub-folders and files, expand the folder and uncheck files and folders inside the main folder you don’t want Cortana to scan during the search.
6 – Now hit the OK button.
Windows 10 will automatically being indexing new files and folders, but it could take some time so be patient. If you don’t want to wait or its taking too long for the process to complete or the search is not working properly then go the Indexing Options settings page and perform the following steps.
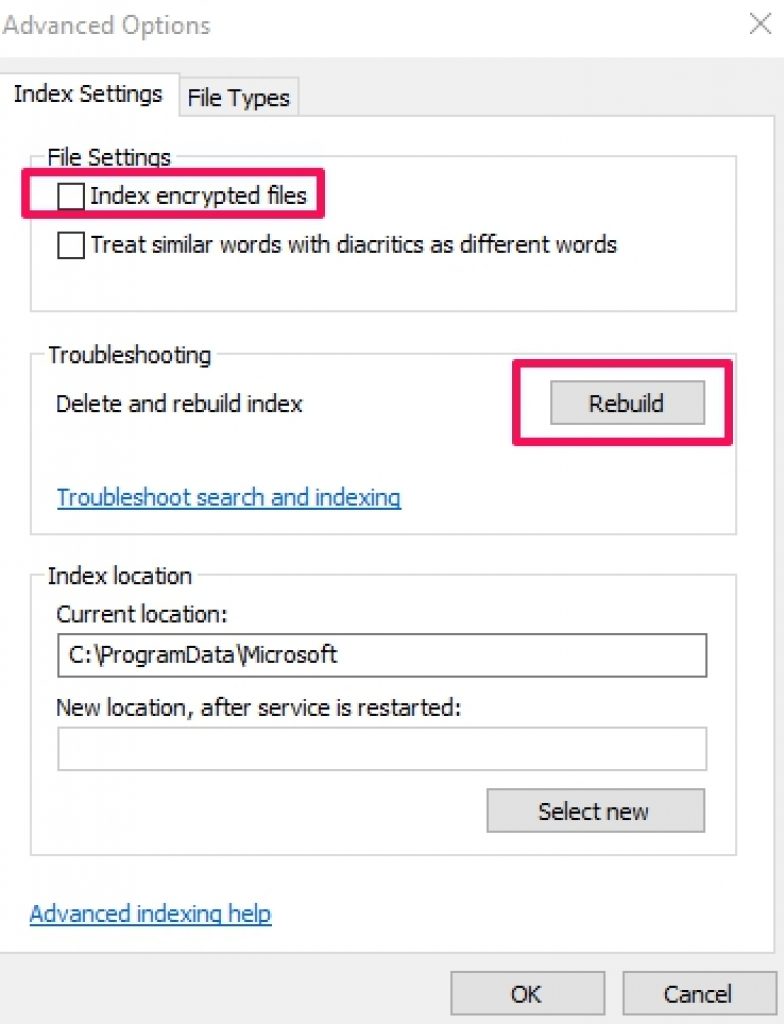
1 – Click Advanced and then hit Rebuild button.
2 – Now click OK to confirm selection.
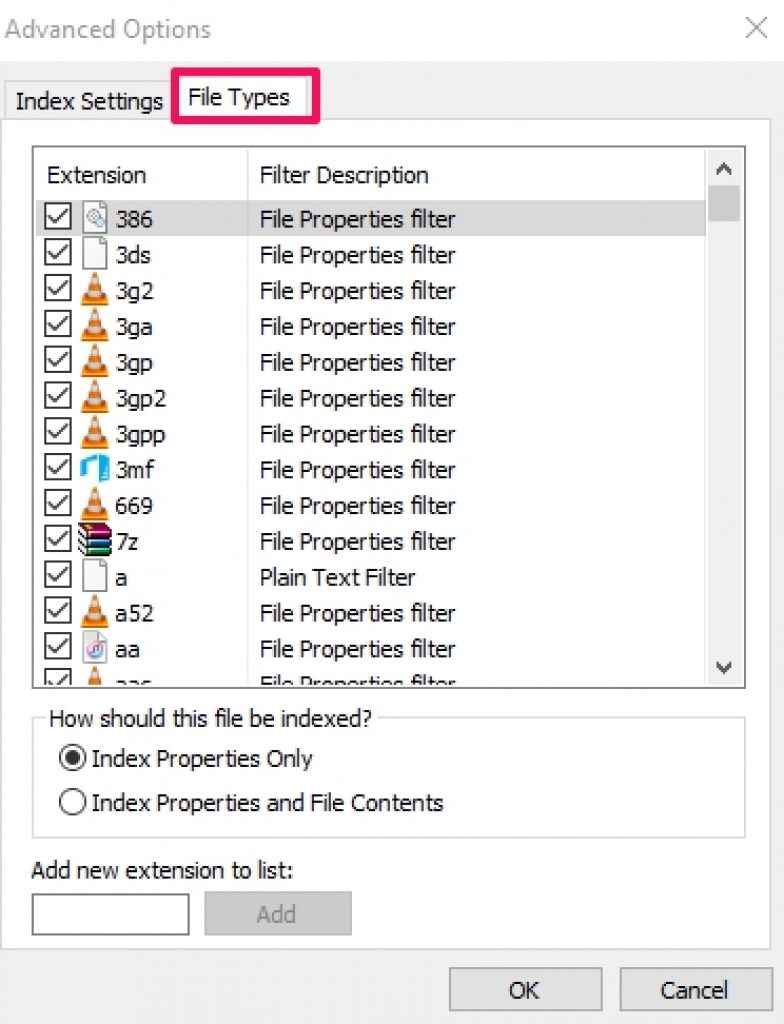
Make sure Index Encrypted Files options under Advanced Options is checked for encrypted files stored on PC. Click on the File Type tab and configure which files extensions you want to see in search results.
Now hit the OK button to confirm customized changes in search settings.
Wrap Up
Cortana is pretty intelligent digital search assistant but to get the best out of it some options have to be configured manually. Now you know why some files don’t show up in Cortana search list and how you can set them to appear in the search result. Tell us what you think in the comments section below.
Read more on Appsforwin10:
How to Fix Cortana Taskbar Search not Working on Windows 10 PC
Opera Browser News & Research for Windows 10 & Mac (PC/Laptop)
How to Change Search Engine on Microsoft Edge

