Windows 10 comes with a whole new start menu interface unlike anything seen in previous Windows operating systems, it includes live tiles of all essential Microsoft apps that are pre-installed with every Windows copy. Start Menu in Windows 10 can be customized to delete or add any app you like, apps are shown in the form of live tiles on Start Menu screen giving you the updated summary of latest changes in those apps. One of the most widely used innate apps is the Windows 10 Mail app using which you can handle all email related tasks from one place. With Start Menu Mail app you can create, edit and manage email accounts without leaving the app, hence, saving you the time and effort required in toggling among different email accounts for daily business and personal purposes.
Here is the step-by-step process by which you can create and manage mail accounts on PC Windows 10.
Setup Email Accounts
By-default Mail app logs in to your Outlook or Windows Live email account but you can also add email addresses associated with other email services including Gmail, Yahoo or any other service compatible with POP & IMAP. In order to create new email account in Mail app, open it by going to Start and click on the mail tile on the menu.
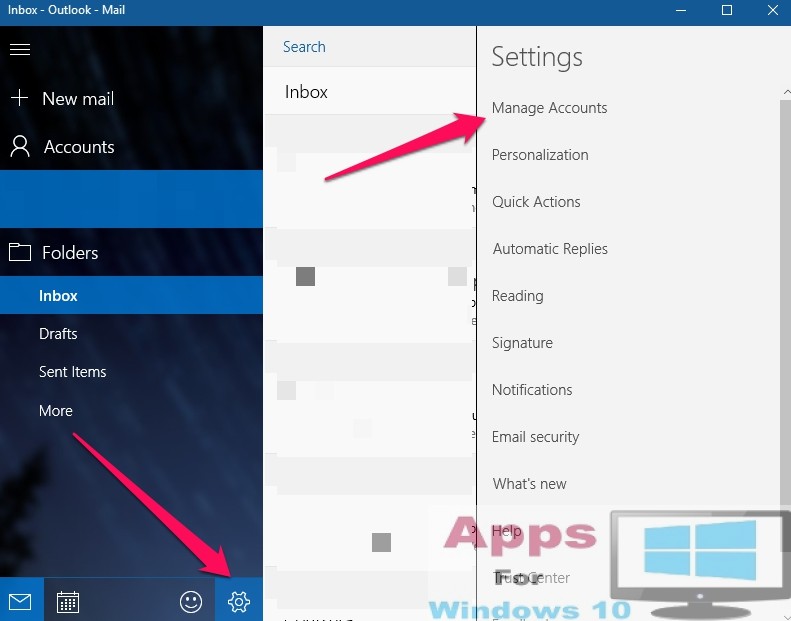
If you are using it for the first time, click Get Started and enter your Outlook or Windows Live account details to setup a new account. Now to add more email accounts click or tap Settings icon in the bottom corner of the left-hand pane of the mail window and hit Manage Accounts option from settings window.
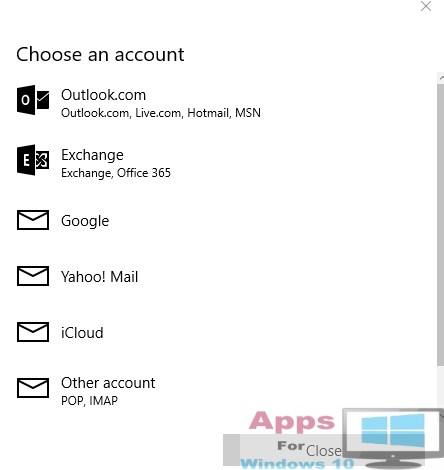
Now click Add account option from the right side bar that appears on the screen after clicking Manage Accounts settings. This will open another Choose an account window from where you can select email service linked to your email addresses, click on the one you want to use. Follow on-screen instructions and email account will be setup in no time, it will show on the left pane of the Mail App under your Outlook email account.
You can use this method to add as many email accounts as you like and switch among them from left mail app window pane without leaving the app.
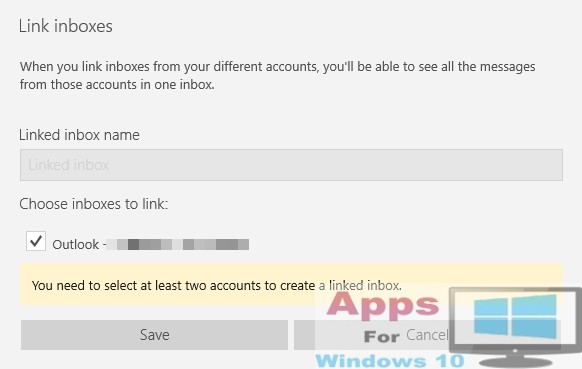
Link Inboxes from Multiple Email Accounts
There is an option available for accessing multiple inboxes linked to different email accounts from one joined email inbox, designed mainly to save you the time of switching accounts for viewing emails from separate email accounts. Winodws 10 phone users can click here to see the method of setting up linked inboxes on phones. PC users see instructions below for enabling linked account option within Mail app.
- Click Settings > Manage Accounts > Link Inboxes
- From new link inboxes window select email accounts whose inbox you want to see together as one inbox from within the Mail App and click save.
Email Customization
Windows 10 native Mail app comes with plenty of customization options, which you can use to fine tune appearance and tile colors of the app window. Here’s how you can effect changes in your Windows mailing experience.
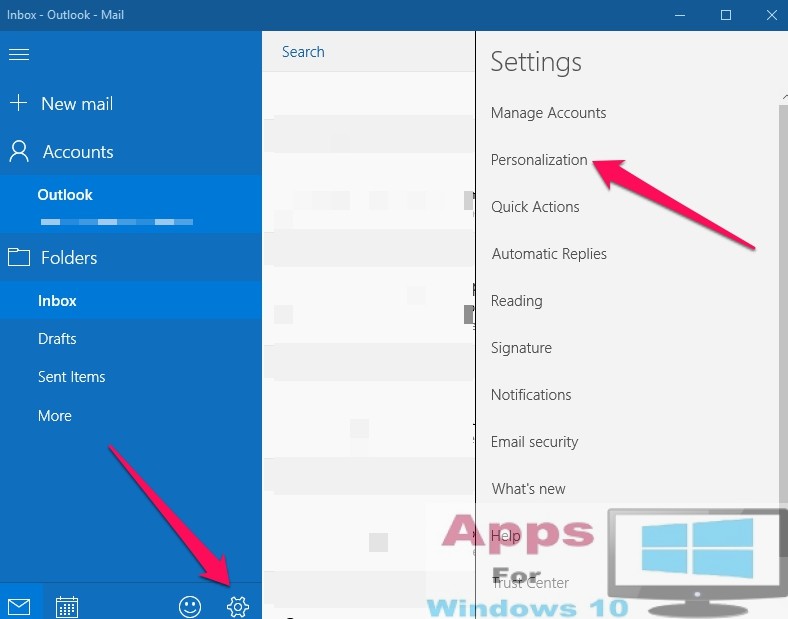
Click on Settings > Personalization
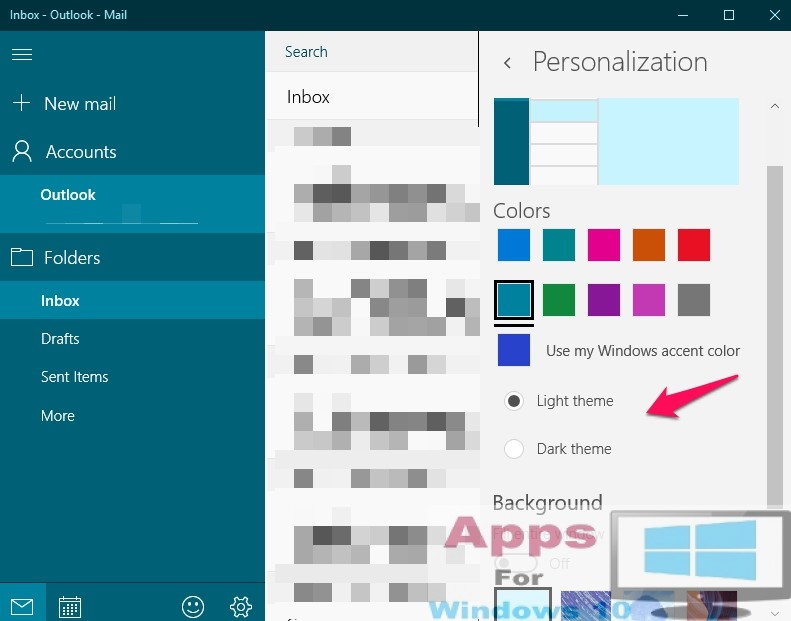
From Personalization sidebar you can set mail window background colors and change them when you like. Choose between light and dark themes according to your liking. Also pick picture to cover the background of the window where all email messages appear, you can choose to cover some part or whole pane with background picture, moreover, you can browse picture to set them as background.
In Settings > Personalized > Reading option, you can choose options related to email reading and management. By switching Auto-open next item option to ‘on’ mail app will open next email in line immediately after you delete the current one. Here you can choose how you want to navigate email window either by using mouse cursor or keyboard keys such as up/down/right/left to move among emails.
Windows Mail app let’s you set changes for individual email accounts or all of them together depending how you prefer the layout and email alignment. Add signatures to your emails, mark emails as flagged, read/unread, delete emails using mouse cursor or taps on touch screens. You can turn touch screen related option on/off if you are using touchscreen Windows 10 PC or tablet. Create groups to send message to multiple users simultaneously. New Windows 10 action center notifies when new email is received, you can switch notification settings as per your liking, getting emails from multiple accounts can get distracting so set each email account’s notification according to their importance to avoid cluster of notifications in the action center.
You can set whether to automatically or manually download images in emails or disable the option altogether. Pin entire Mail app window, individual folder or email account to the start menu for quick access. Just right-click on the folder or email account and select pin to start from context menu.
There is an important feature called syncing emails using which you can decided how often you want Mail app to fetch new emails. Set the fetching interval time by heading to Settings > Manage Accounts and select the account you want to set sync settings for and click change mailbox sync settings.
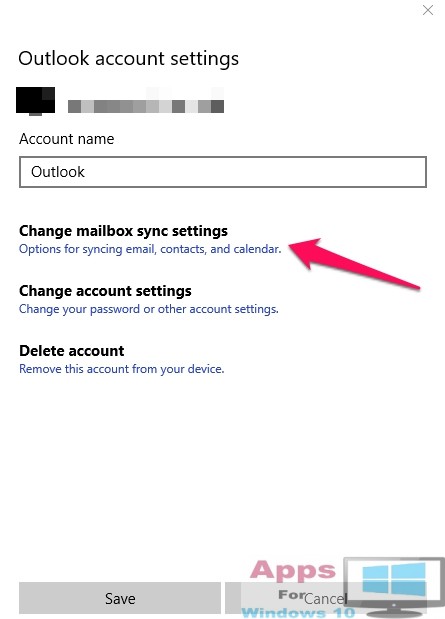
Similarly, you can set contacts and calendars syncing settings too from this window. Once the sync options are set all new contacts added, meetings & schedules and latest emails will automatically be updated in the Mail app.
For More, Read: Best Android Apps Emulators for PC (Windows 10/8/8.1 & Mac) & Top 7 Best Email Clients for PC – Windows 10