Sometime when things stop working as normal on Windows 10, it could be because of some sort of problem with your Microsoft account linked with PC. Here you can see how to fix Windows 10 problems using a local account on PC. Apart from Windows 10 Enterprise Edition, Microsoft wants you to use Microsoft account on Windows 10 rather than a local account. Reason being Microsoft account lets you connect multiple Windows devices and services via a single Microsoft account for easy access and backup. Linking your Windows devices with Microsoft account is now essential to be able to use most advanced services from Microsoft.
Having multiple Windows devices linked with a single Microsoft account makes it easy to sync settings across multiple devices; get latest Windows Store apps; updating an app on one device, updates it on all other devices linked with that Microsoft account; you can reset password on one device and it changes on rest of the Windows powered devices. However, you cannot discount the possibility of an error affecting the normal functioning of Microsoft account. Error may occur while trying to update apps, software or OS; or Windows 10 features such as Action Center, Start menu or Cortana may stop working properly.
There are several troubleshooting solutions you can use to fix errors on Windows 10. But there is also another tried and tested ‘using a local administrator account’ method to solve issues on Windows 10 to see if the problem is with Microsoft account on your PC.
In this Windows 10 guide, we are going to show you how to setup a local administrator account on PC to fix issues on Windows 10, and what steps to take when the original problems can’t be fixed.
1 – Create a Local Administrator Account on Windows 10 PC
1 – Open Settings by pressing ‘Windows + I’ keyboard shortcut and click on Accounts option.
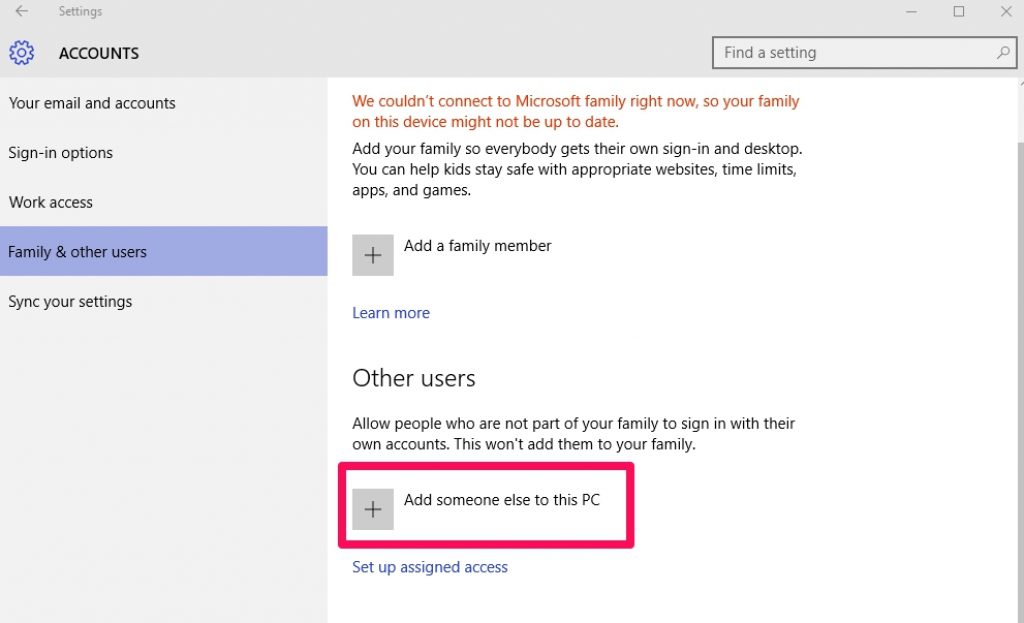
2 – Click on Family & other people.
3 – Under ‘other people’, click the Add someone else to this PC option.
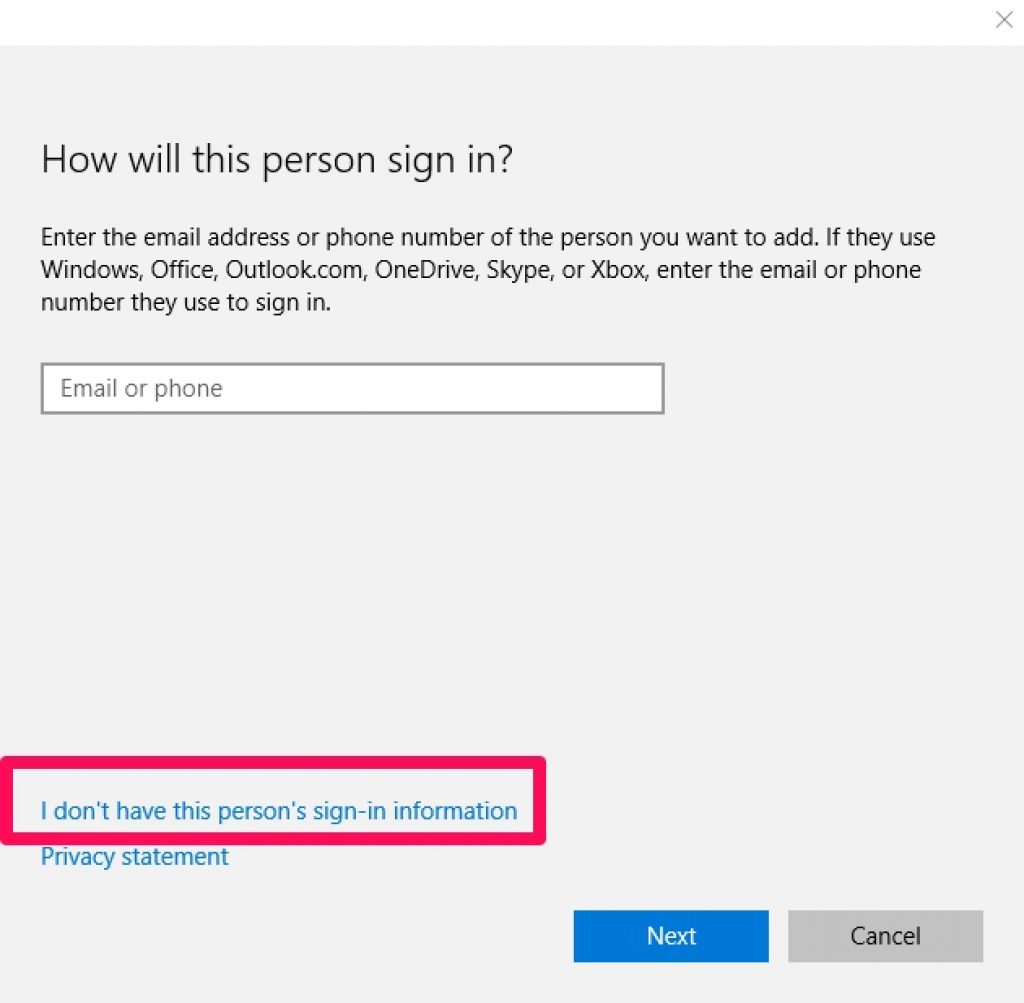
4 – Click the I don’ have this person’s sign-in information link.
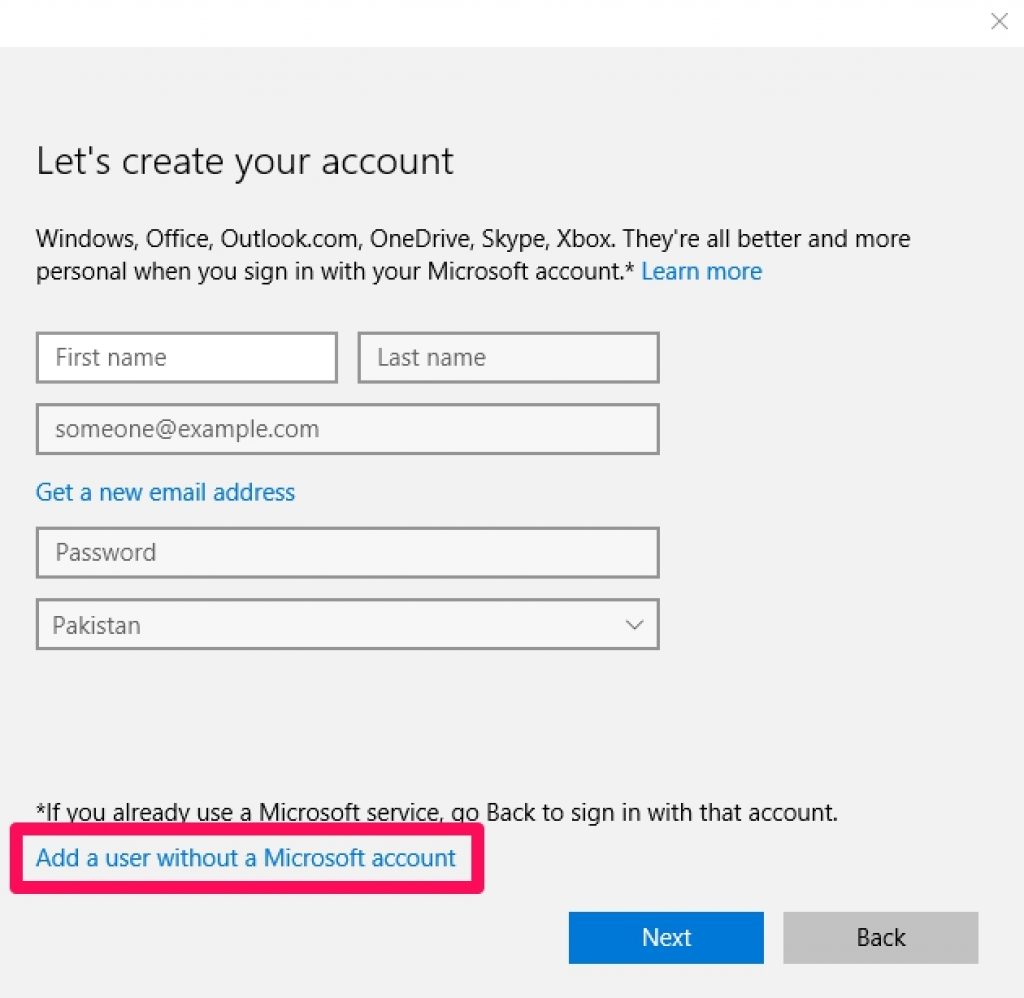
5 – Now click the Add a user without a Microsoft account link on the next box.
6 – Type in the information in required fields to create a local account and hit the Next button.
Set Account Type as Administrator
When you set new accounts on Windows 10, they are set as Standard accounts by default, you will need to manually set the account type to administrator.
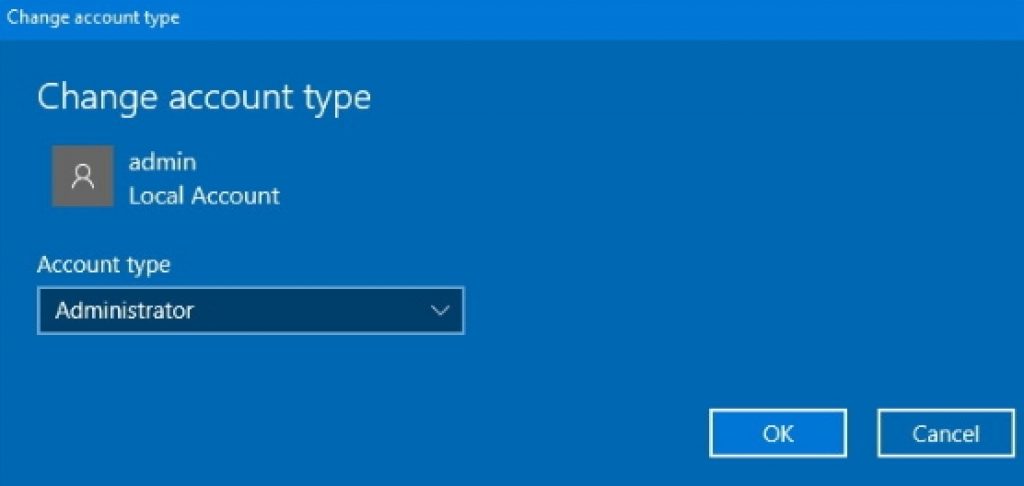
1 – In Settings > Accounts > Family & other people, select the local account which you just created by following instructions above and click on Change account type button.
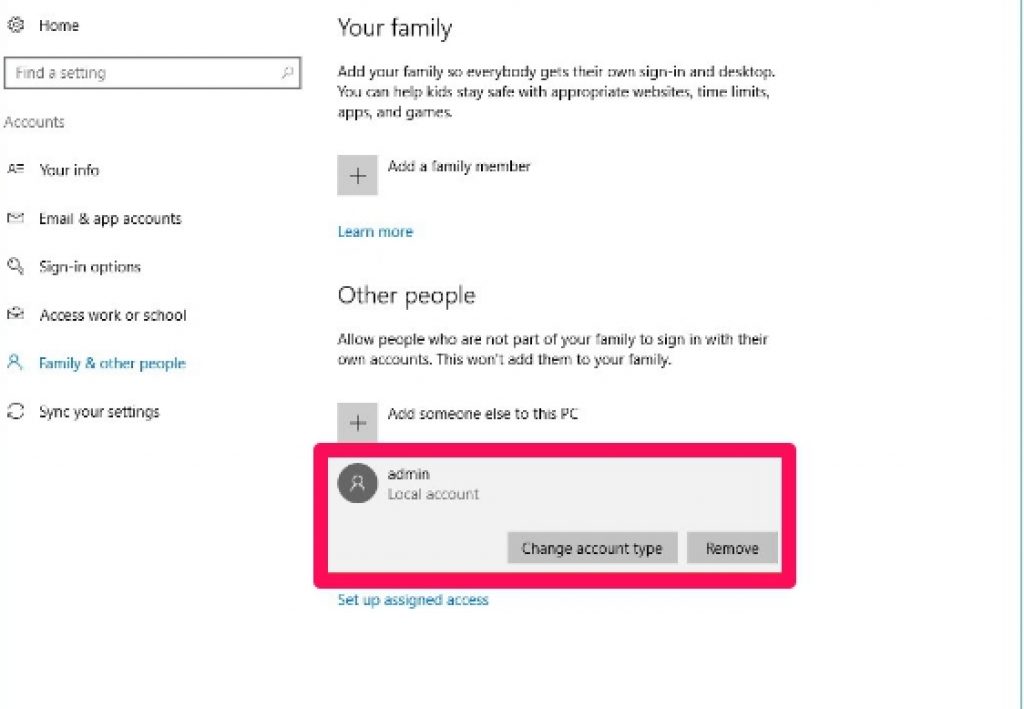 2 – Change the account type to Administrator and hit the OK button.
2 – Use Local Administrator Account to Troubleshoot Windows 10 PC
After creating the local account from the above guide, restart the PC and sign-in with the new local administrator account.
Now check whether the Windows 10 issues linked to your Microsoft account are occurring again when signing-in with the new local account.
If all seem to be working fine with the new account then you get a clearer idea of what was causing problems on Windows 10. Let’s say, if Cortana suddenly became unresponsive or system froze unexpectedly, then you can fairly certainly conclude that the issue was with your Profile account and not with the operating system as such.
After identifying issues with Windows 10, its time to solve troubleshoot them using different method as described below.
3 – Move to a new Windows 10 Account on PC
If the newly created account works properly but the problem remains, then you can move all files, apps, settings, data to the new account and delete the faulty Windows 10 account. Here’s how:
How to Move Files to a New Account on Windows 10
1 – Make sure you are logged into the new local account on Windows 10 PC.
2 – Press Windows + E keyboard shortcut to open file explorer window.
3 – Click on This PC from left window pane and double-click on the C: Drive.
4 – Double-click the User folder and find old account’ folder and double-click it.
5 – Click ‘Continue’ when asked ‘You don’t currently have permission to access this folder’ on a dialog box.
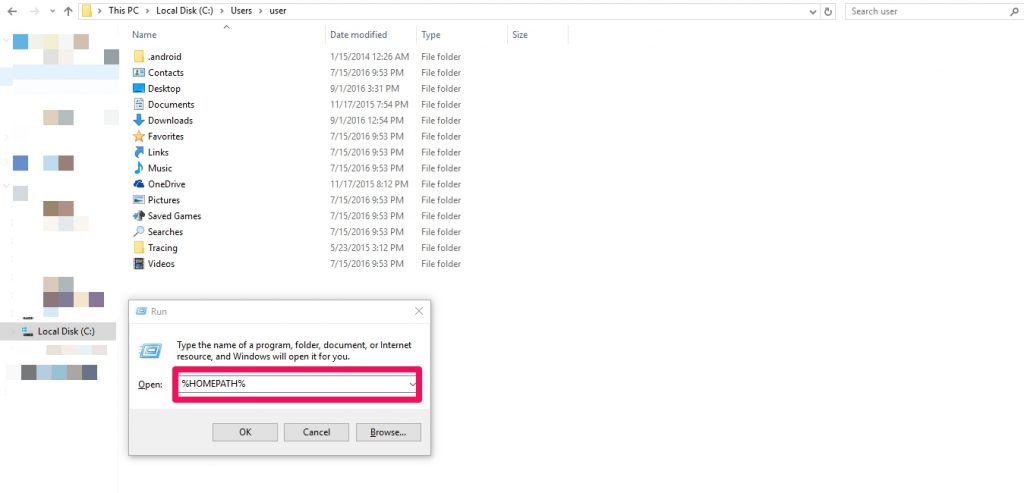
6 – Press Windows + R keyboard shortcut to open the Run command box and type the following command in the prompt.
%HOMEPATH%
7 – Click OK to open a second File Explorer window in the home folder of your profile.
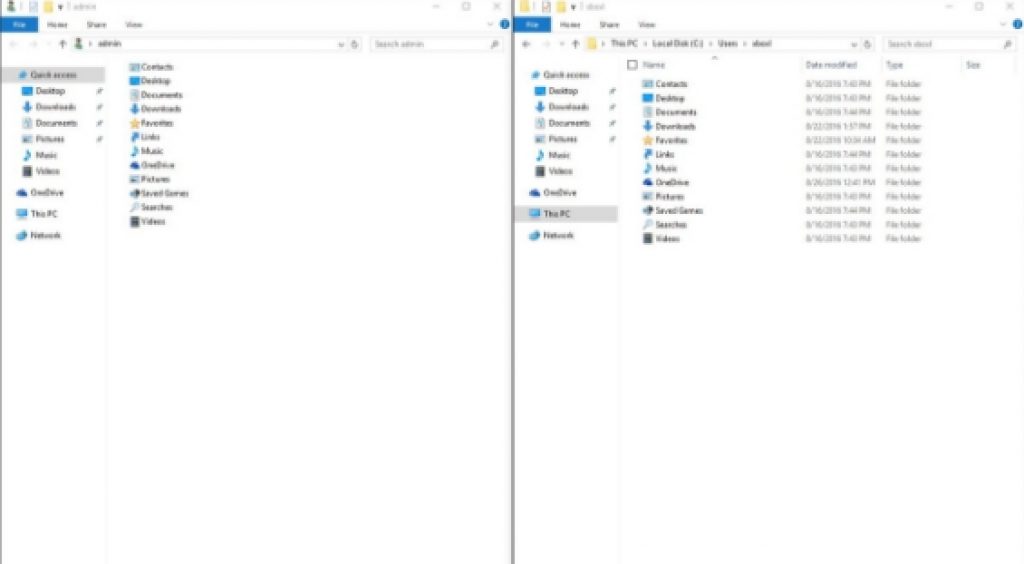
8 – Press Windows + Left Arrow keys to move your new home folder to the left side of the screen.
9 – From the Snap assistant, select to snap old home folder to the right side of the screen.
10 – Now copy the content from the old account home folder (on the right) to the new account home folder (on the left).
After completing the above process, make sure that you have access to all applications. Some apps may not re-installation because some apps are installed per account basis instead of per computer. For some program, you may need the product key to reactivate them.
Delete Old Account
Now in order to setup your newly created account as Microsoft account, you will need to delete the old (faulty) account after moving files and apps to the new account. Here’s how to remove problematic Windows 10 account from PC:
1 – Open Settings and navigate to Accounts > Family & other people.
2 – Old Account will be under ‘Other People’, select and click Remove button.
3 – On Account deletion confirmation page, click Delete account and data button.
How to Set Administrator account as Microsoft Account:
Now that you have deleted the old account, you can now setup newly created Administrator account as Microsoft Account, here’s how:
1 – Open Settings.
2 – Go to Accounts > Your email and accounts.
3 – Click on the Sign in with a Microsoft account instead link.
4 – Type your Microsoft account email address and password and hit the Sign in button.
5 – On the next screen, you will be asked to enter current administrator local account password and hit the Next button.
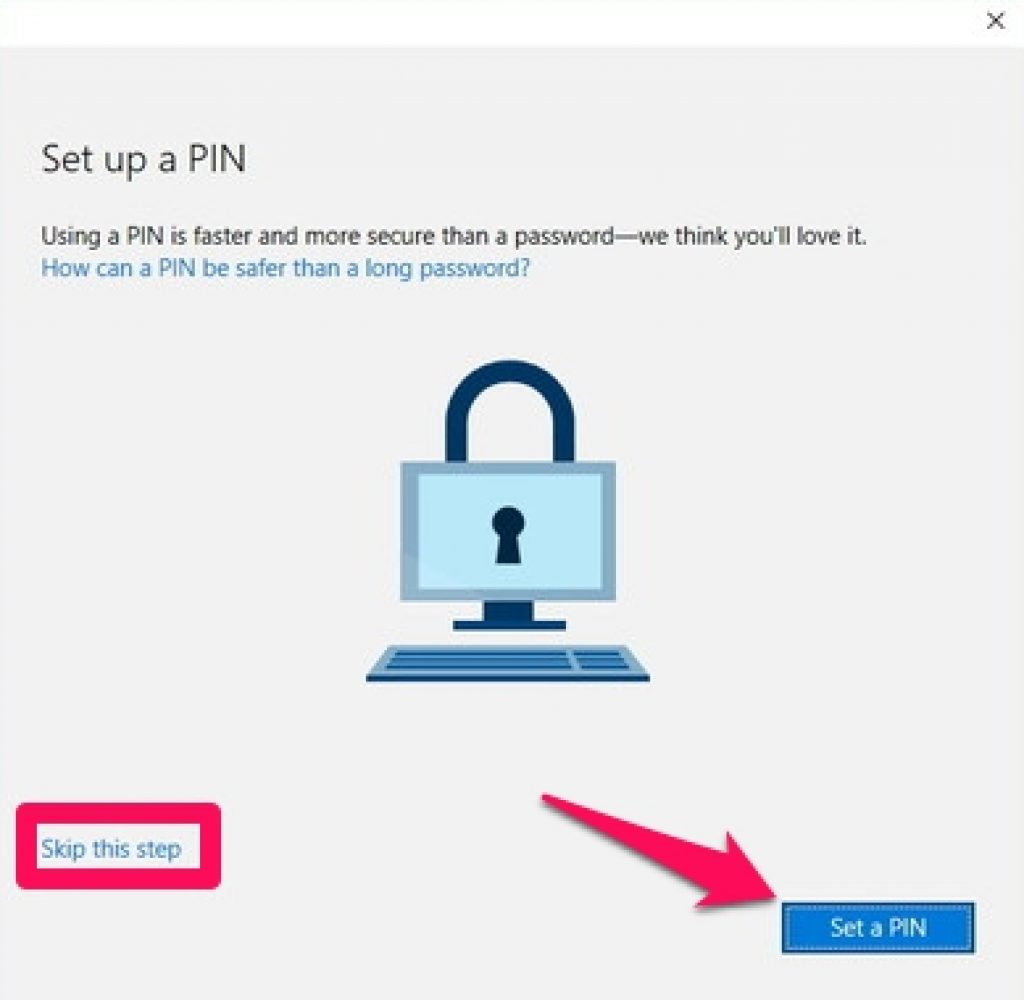
6 – Choose whether to click the ‘skip this step’ or set a pin instead of a password.
This will sync all your information and Windows settings stored on the cloud to your PC. For some settings you will need to verify new local account.
1 – Open Settings.
2 – Go to Accounts > Sync your settings.
3 – Click the verify link and follow on-screen instructions as prompted to verify your new local admin account as Microsoft account.
That’s all. You have now setup a new local account to replace the old faulty Microsoft account to fix errors and problems associated with that account on Windows 10 PC.
Wrap Up
We hope that the above guide helped you to solve problems that you were facing with your previous Microsoft account. In future, if similar problems start arising linked to the newly created local account, then you can follow the guide above to create a new local account to start again with an error-free account.
Have you been able to fix errors and issues on Windows 10 PC using this guide? Share your experience in the comments below.
For More on Appsforwin10, see:
Top 3 Antivirus for Windows 10 PC.
How to Fix Windows 10 Store App Crash Issue
How to Recover Lost Data from PC

