Today we will let you know a well known issue that has been faced by Windows 10 users who have recently updated their PC operating system to the latest one, i.e Windows 10. There have been complains of Windows Defender which has the minor virus protection and malware and spam detection. To Disable Windows Defender for Windows 10 is quite simple but most of users have claimed that it turns itself on automatically and keep on targeting the modded files including some game *.DLL files or some crack files as trojans warnings pops up on the newly developed Notification centre. So this guide will help you completely Block Windows 10 Defenders processes and get your work done smoothly.
If you have been using the same service in previous version of Windows then you might have been known with the Microsoft Security Essentials app added in the Windows Vista and 7 but later it was changed to Windows Defender helping in blocking and scanning the PC for Adware and spyware. But in this latest version of Windows 10 the Windows Defender plays a role of a fully operating Antivirus which can harm some most needed files especially for the gamers, as recently tons of reports popped up for the GTA V mods not working after upgrading to Windows 10. Some gamers who like to enjoy their game with trainers also suffer the same through the hands of Windows Defender pre-loaded in Windows 10.
The quick solution of Permanently Disable / Uninstall / TurnOff the Windows 10 Defender might be helpful for some time but when your PC gets restarted or gets the latest updates downloaded and installed your Windows Defender app will automatically turns itself ON and same Malware and Virus notifications start popping up resulting in loss of some really useful files for games and other apps. Here we got a little solution to this problem of Disabling Windows Defender permanently so that it can not functions on its own.
How to Permanently Disable / Uninstall / Turn Off Windows Defender Permanently in Windows 10:
One of the most common steps to disable any Windows pre-loaded function is to edit or change its registry file which is a bit hectic and won’t be easy for normal Windows users to follow the whole steps in order to get rid of Windows Defender.
Moreover with each update of the app there are chances that the developers behind this app would add new registry values and the app would re-enable its main functions. So you have to download a small 3rd party program named ” No Defender” ( Thanks to guys at Winaero.com for providing this tool) to permanently disable this function in Windows 10.
All you have to do is follow these instructions given in guide below.
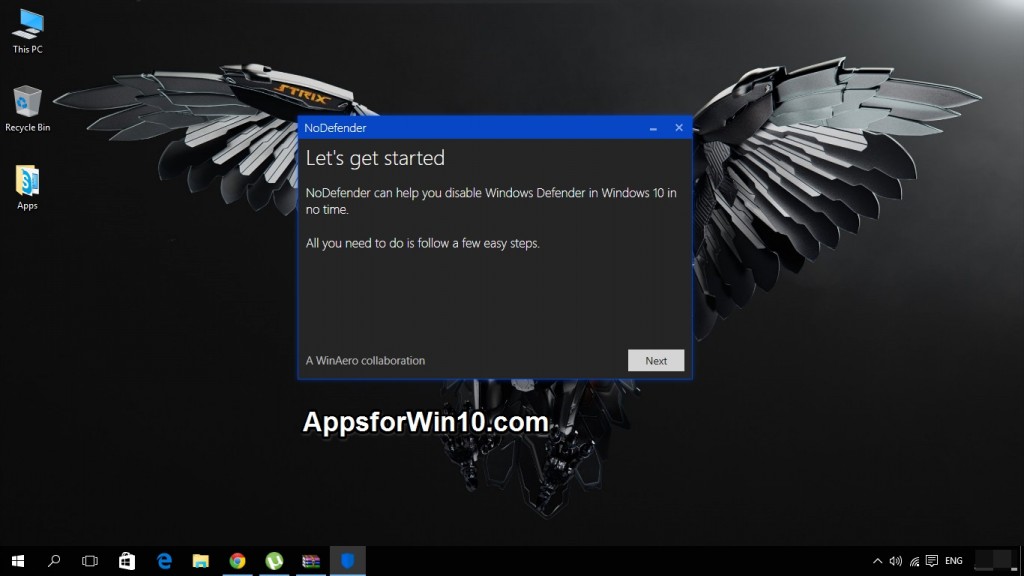
Step 1: As mentioned above first of all you have to download this program ” NoDefender”. I have downloaded it and checked it. It’s totally safe .
Step 2: Extract the file and then run the setup to install.
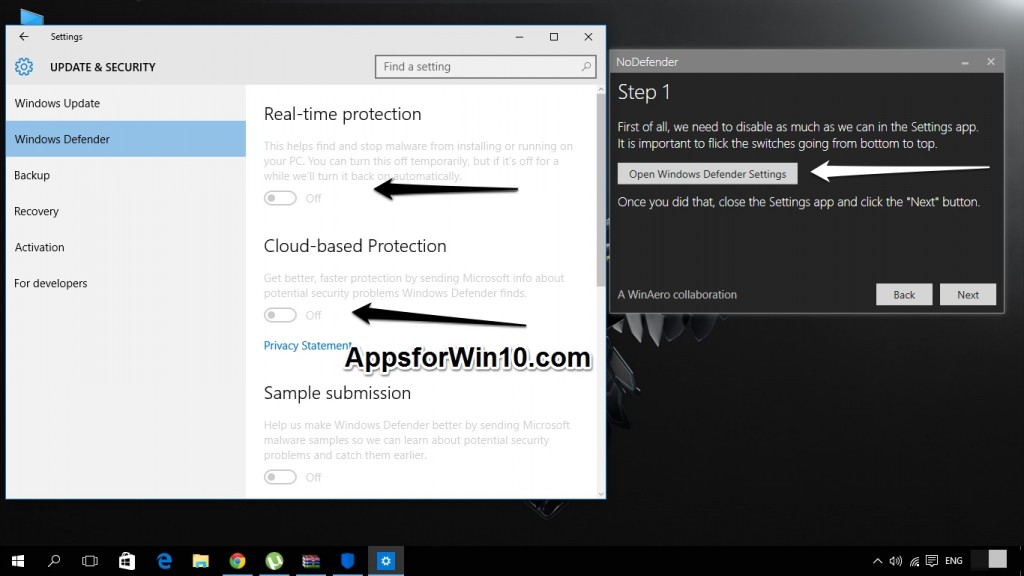
Step 3: Once done open the No Defender app and click on the open Windows Defender Settings by clicking on the button.
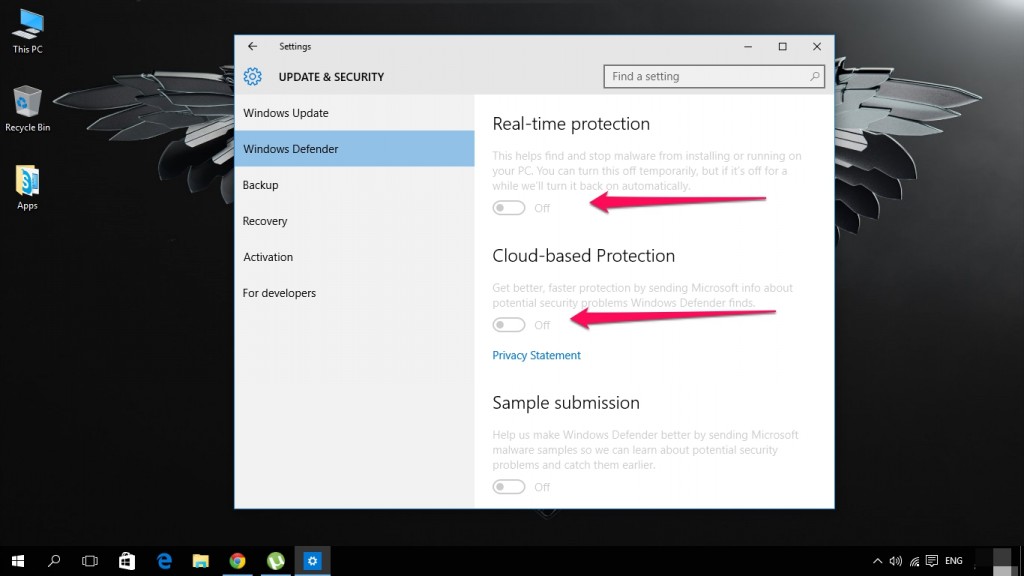
Step 4: Once you clicked on it the Windows Defender windows will open you can Enable or Disable Windows Defender by clicking on the first button as seen in the images below.
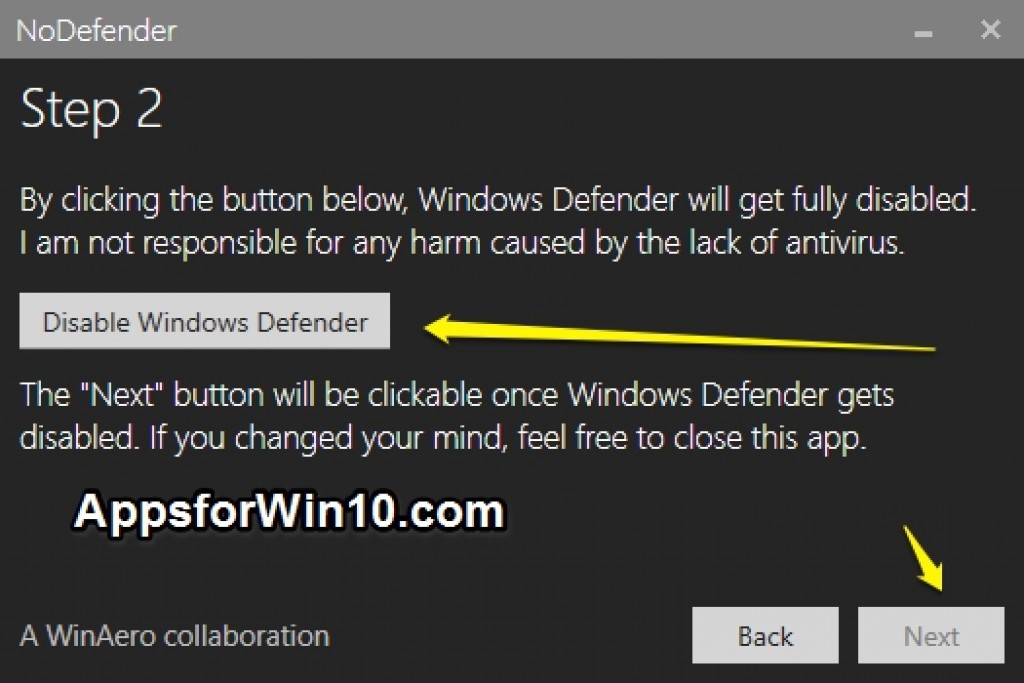
Step 5: Now you should turn back to the app and click on Disable Windows Defender button and then click Next in the given option.
Step 6: That’s it you have successfully got rid of Windows Defender on Windows 10.
You can now download and install any app you want on your PC running Windows 10. You can also have tons of Mods and trainers to be ready to get applied on your favourite game online or offline.
Hope you liked our guide make sure to share the post to let others know about this great app.


