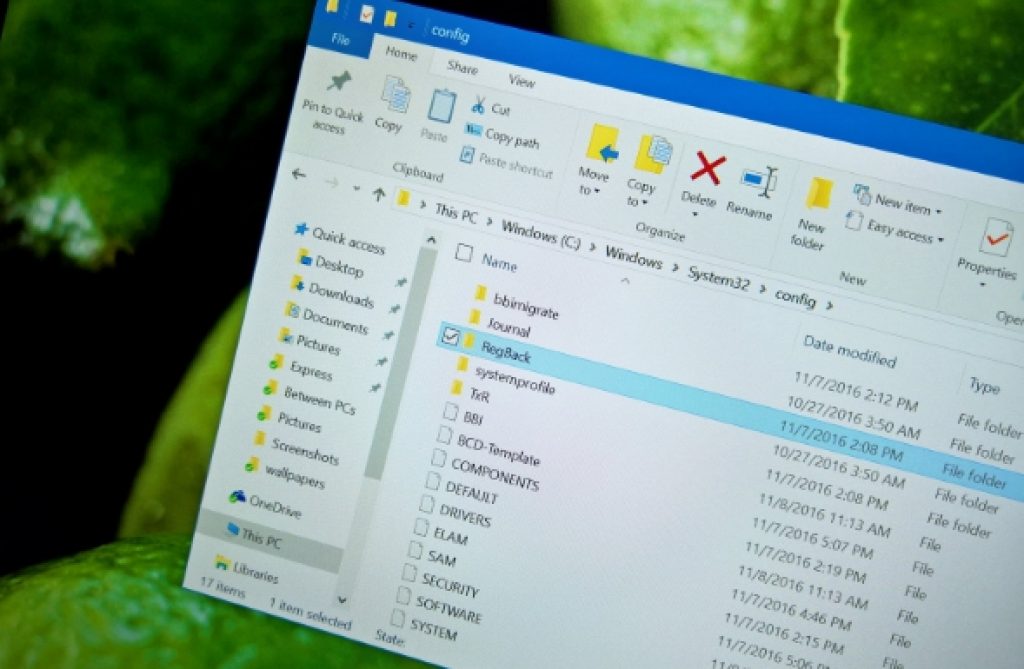
Here see how to access & restore registry on Windows 10 to bring your PC back to a working condition. With the steps in a guide below, you’ll be able to use registry on Windows 10 to restore your computer desktop/laptop back to normal. Windows 10 makes a backup of the Registry in a RegBack folder on PC, which you can use to restore your desktop or laptop PC to a normal working condition. You might want to keep on reading to know how.
Normally, it is recommended that Windows registries should not be tinkered with, as the registry database contain vital settings essential for the proper working of PC and systems apps and programs.
However, some errors and bugs on Windows makes it necessary to modify the system Registry for changing settings in Windows 10, as it saves you the hassle of system restore or reset Windows. But do keep in mind that any mistake can result in further issues, including Windows not working, system file corruption, PC failing to boot and more.
You can prevent so many errors and save time by creating regular Registry backup on PC. This may you’ll be able to restore Registry even if it stops working due to some error or mistake on user’s part. Always create a Registry backup before making changes to the Registry settings, as we’re going to do in this post.
By there is one thing that many Windows 10 users don’t know about the Registry system. If you forget to create a backup, or during installation an unknown error occurs, there’s another way of restoring Windows 10 PC from a corrupted Registry. Windows 10 keeps a backup of a working Registry for recovery purposes, which you can use to manually restore PC Windows 10 back to a working condition even without a backup.
Here’s a step-by-step guide to manually restore previous automatic backup of Windows 10 Registry from its secret location and give your PC a new life without needing to do system reset, restore or fresh Windows 10 install to fix errors or bugs.
How To Restore Windows 10 Registry Manually
Before proceeding please note that modifying, tinkering with system files can cause sever damage to Windows if not done properly. So proceed only if you’re confident enough to follow the steps below, and not before creating a full Windows 10 backup to restore PC in case of any damage caused by mistake.
Here’s are the steps for restoring registry on Windows 10.
1 – First of all, you need to start your PC using Advanced Startup options: Press Windows + I keys on keyboard to open Settings window, click on Update & security, and then click Recovery. Under Advanced startup, click on the Restart button.
2 – Now click on Troubleshoot.
3 – Click on Advanced options.
4 – Click on Command prompt.
5 – Your device will start in command prompt (X:\Windows\System32). Move to the drive where Windows is installed, mostly its the C:\. But in recovery mode, the drive letter may be different such as E:\ or other. Therefore, type the correct drive letter, for example E:\ or where Windows is installed, in command prompt to enter into the correct drive where Windows is installed and hit enter.
6 – To verify that you’re in the correct drive, type the following command and hit enter:
dir
Now if you see the Windows folder, it means you’re in the correct drive. Now return to the previous step and try with another letter until you’re in correct drive.
7 – Now type the following command to access the System32 folder and hit enter:
cd E:\Windows\System32\
Remember to replace E:\ in the above command with the accurate drive letter for your device.
8 – Next, type the command below to create a folder for temporary backup of files on the config folder. This command also saves a copy of the registry. After typing the command hit enter.
mkdir configBak
9 – Now to create a temporary backup of the files in the Config folder, type the following command and hit enter:
Copy config configBak
10 – Here, you need to access the Regback where a Registry backup is saved. Type the command below and hit enter:
cd config\Regback
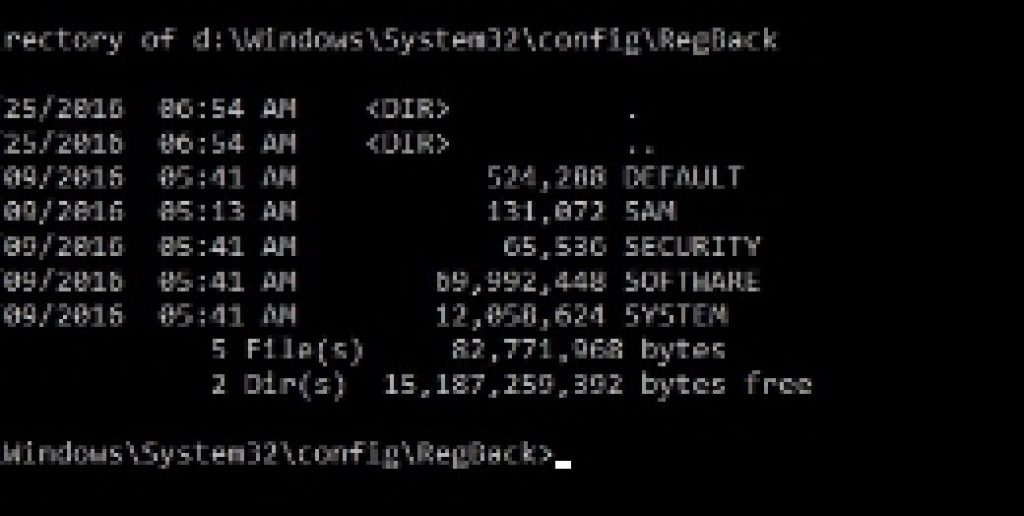
11 – Now to verify the content of the RegBack folder, type the following command and press enter:
dir
Important: After entering the ‘dir’ command, makes sure the size of the (Default, SAM, Security, Software, System) files should be similar to the size shown in the image below. If any of the files shows 0, do not continue as it will damage Windows 10 PC.
12 – Now, type the command below to copy the files from RegBack folder to the Config folder and hit enter and press Y key next to every other command question that follows.
Copy * ..\*
13 – Close the command prompt Windows when the task is complete.
14 – Reboot PC after which it should be back to a working condition.
15 – All done.
You can follow the steps above in Windows 7 and Windows 8.1 operating systems as well. For queries, send comments below.
Also see on Appsforwin10:
How to Shut Down Windows 10 using Cortana Voice Command
How To Create an ISO File with an ESD Image on Windows 10
How To Turn Windows PC into a WiFi Hotspot – (Share a Wired/Wireless Internet Connection in Windows 7, 10, 8)


