Here is the trick to cancel Windows 10 Insider Preview build that you don’t like to be installed on your PC automatically. In this guide you can see how to stop Windows 10 Insider Build from accidentally installing on PC desktop or laptop. Microsoft launched Windows Insider Preview Build Program as part of its latest Windows 10 operating system last year that allows users to test pre-released Windows 10 updates. Windows Insider Preview programs lets you test new changes and features that are going to the a part of a new major or cumulative update. Insider Preview build program users can get latest Windows 10 features before other users as part of Windows updates.
But there is also a downside to being a member of Insider Preview program that since preview updates are work-in-progress and may contain some bugs and errors which can have an effect on your system’s normal functioning. So unless you are entirely comfortable with running unstable codes in under developed early update, it is recommended that you install them on spare PC or laptop to test new Windows 10 updates.
Most of the time Microsoft releases stable early preview build updates for Windows 10 PC and mobile users packed with amazing new features and changes. Being a member of Windows Preview Build program puts you in an advantageous position as to enjoying new changes before they are made public in a major worldwide release. But sometimes, especially early on in any new preview build update, chances of bugs and errors are relatively high, so you should be careful before installing them on your main PC used for daily purposes.
You can change Windows Insider Preview preferences to stop getting new updates. But if you forgot to adjust settings, new Windows 10 version, will download preview build updates automatically to your PC without letting you opt out of the update and regardless of how stable or unstable it might be.
In the guide below, see how you can prevent Windows 10 insider preview build installation after it downloaded to your PC.
How to Stop Windows 10 PC Insider Preview Build Installation
Instructions below will assist you to stop the installation of a new version Windows 10 Insider Preview build update available on the Fast Ring, which is highly likely to contain bugs.
Note: Do NOT, at any time throughout this process, restart your PC.
1 – Change Insider Preview Preference
This first trick will help you to make changes to the Windows Insider Preview settings to opt out of the current batch of updates or stop getting further preview builds.
- Open Settings.
- Click on Update & security.
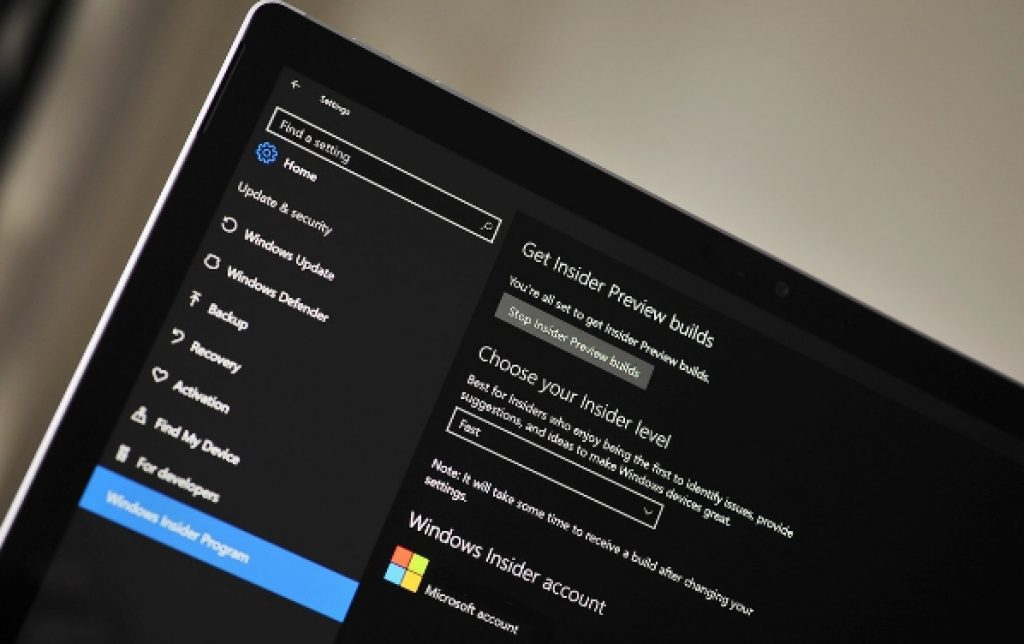
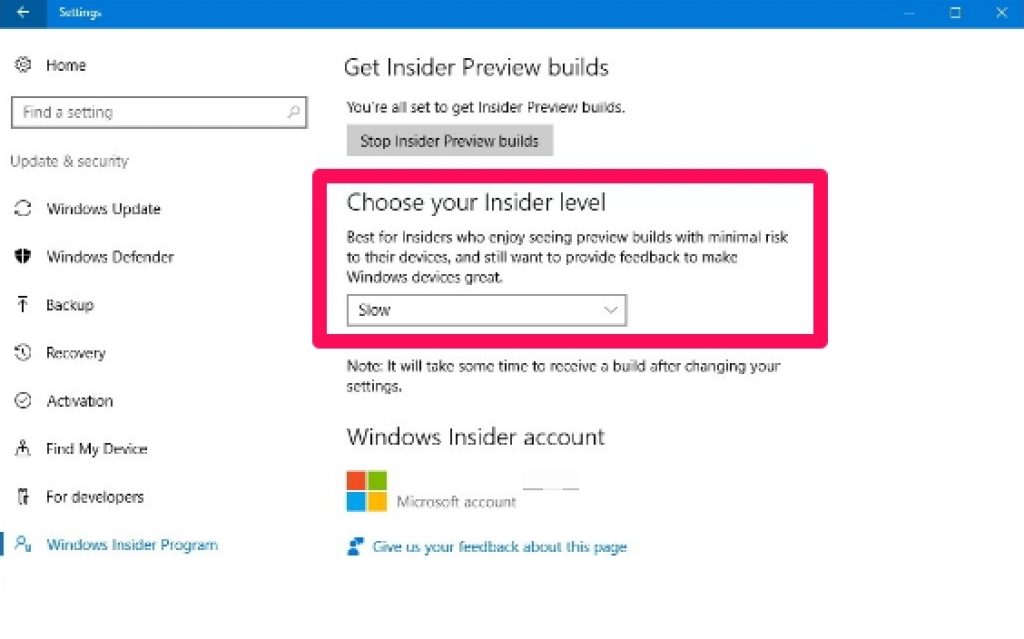
- Now click on Windows Insider Program. You will see this option if you are a member of Windows Insider Preview Build Fast, Slow or Release Preview ring.
- Lower ring level from Fast Ring to Slow or Release Preview.
If you want to stop the download, change this setting while the build is downloading.
2 – Change Active Hours Settings
Here’s how to stop the system from automatically restarting while you are in the middle of making changes. Change the Active Hours settings to delay the restart.
- Open Settings.
- Click on Update & security.
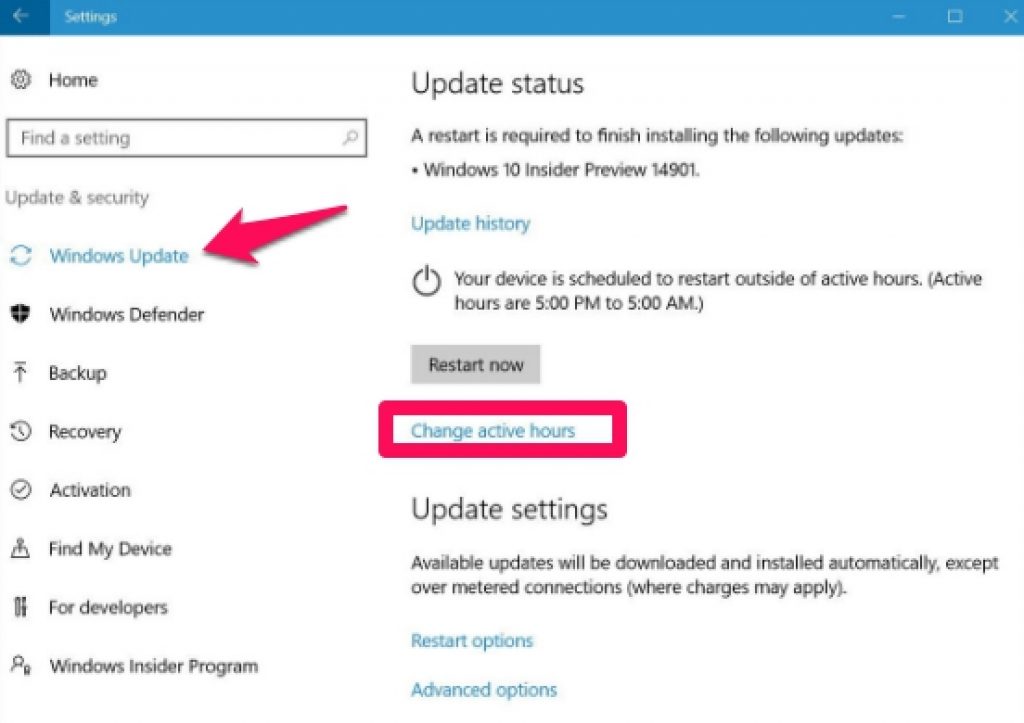
- Click on Windows Update.
- Click the Change active hours link.
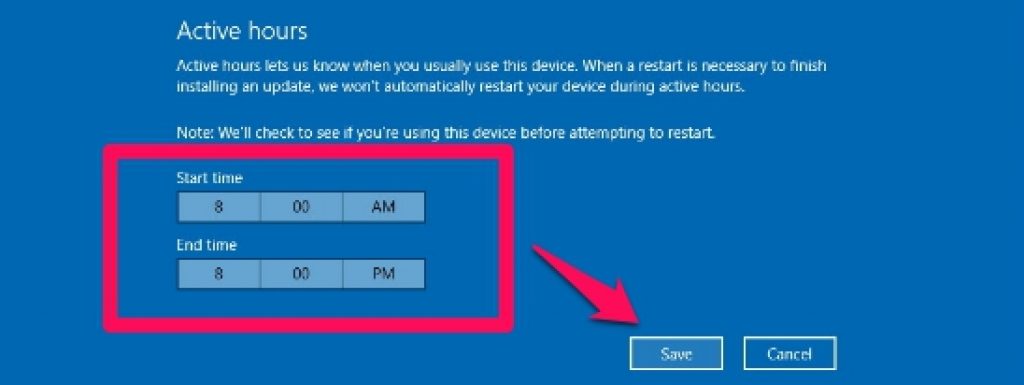
- Set the Start time and End time to delay the restart to the maximum of 12 hours and hit the save button.
3 – Delete the Installation Files from PC
In the above solution you made changes in the settings to stop getting new update flights. But you might have noticed that Windows Update still shows the preview update ready to install at the next restart.
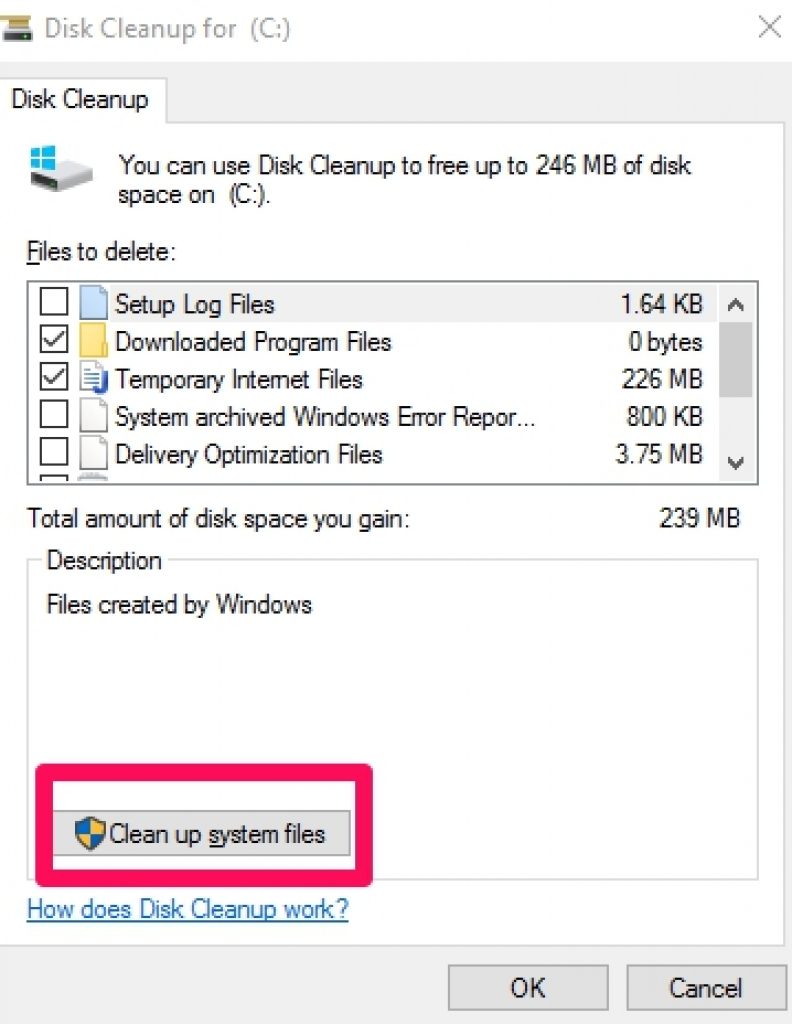
To address this issue, you need to run the Disk Cleanup utility to delete the build update installation files properly and then quickly remove the update from list on Windows Update.
- Press the Windows + R keys to open the Run command prompt.
- Type Claenmgr and hit OK to launch the Disk Cleanup tool.
- Select the C: drive and hit OK. Or simply right-click on the C: drive in ‘This PC’, select Properties from the context menu, click on General tab and hit the disk cleanup button.
- Now Click the Clean up system files button.
- Make sure the C: drive is selected and then hit the OK button.
- Select the Temporary Windows installation files option.
- Uncheck any other option who don’t want removed from PC.
- Hit the OK button and click Delete Files.
After going through this process, wait for a few minutes for changes to take effect. Now go back to Windows Update in Settings, there you will notice Windows 10 new update installation files for the new insider preview build download on your computer will no longer be on the list.
You can download cumulative updates however, download them as normal and restart PC to finalize changes after installing cumulative update as they are final version pushed on to PCs by Microsoft and don’t contain any errors or bugs.
Share your Windows 10 insider preview build experience in the comments section below.
For more on Appsforwin10, Read:
How To Get Windows 10 Mobile Preview Builds
All smartphones with Windows 10 Support.
How to Uninstall & Reinstall Built-in Apps on Windows 10

